

For the last few months, my computer has been resetting the time each time it starts up, including a restore from hibernation.
The usual culprit is the BIOS CMOS battery. So, I bought a few CR2032 batteries on Amazon and changed the battery on the motherboard. That didn't help. Maybe the new battery was dead. Tried another new battery; still nothing.
So I started Googling. After a few hours of skipping through all the posts about the CMOS battery, I finally stumbled across a post mentioning it could be a fault with the RTC crystal. This little component keeps track of the time, as its name implies. Attempting to de-solder and replace the RTC crystal was not something I was willing to risk at this stage. So, I decided to live with the fault, for now.

Now, this means manually setting the time every morning. To do this, you right-click the time in the taskbar (bottom-right by default), then click "Adjust date/time". In the window that opens up, you click the "Sync now" button, under the heading "Synchronize your clock". This was okay for the first few days, though I did forget it a few times and only remembered later in the day. Windows 10 does not seem to automatically sync the time if there is a big time difference, for whatever reason.
Moving on... I searched for ways to automate this task. Here are the commands to do this:
:: Stop the time sync service, if already running
net stop w32time

:: Start the time sync service
net start w32time

:: Force a time resync with the default time/NTP server
w32tm /resync
I threw this into a batch file, along with some error checks and options to retry on failure. You can download the batch file from my Github profile.
w32tm is an interesting command with a lot of other options. Some are discussed in this serverfault comment. You can also get the whole list of options by typing w32tm /? at your command prompt.
To run this batch file automatically, I created a task, using Task Scheduler. Click the start button, type "task scheduler" and you should see the app. After opening the app, click "Create Task" in the right side and then follow the screenshots below.
Remember, the task needs to run "at startup" (covers a fresh boot / restart) and "on workstation unlock" (covers standby / hibernation). It needs to run only when there is a network connection available and it needs to run with the highest privileges.
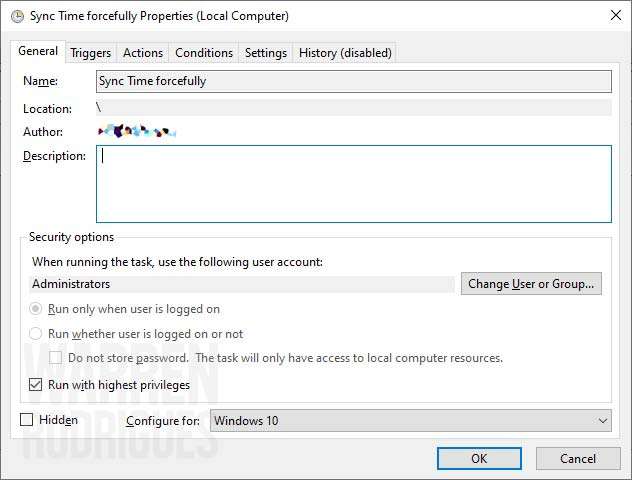 Remember to check "Run with highest privileges" and change the user to "Administrators" group.
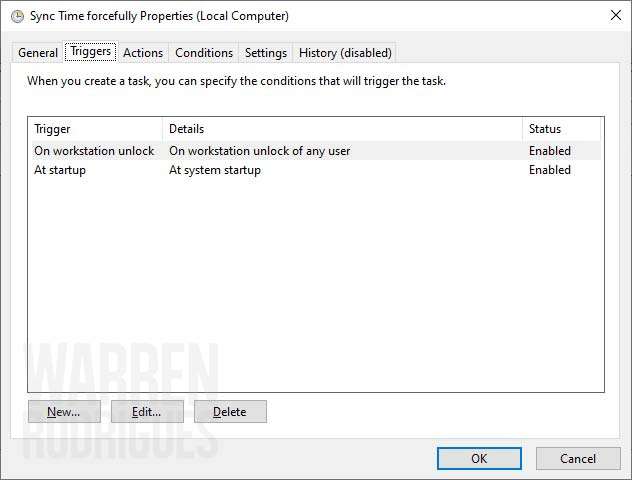 Set up the two triggers, as described above.
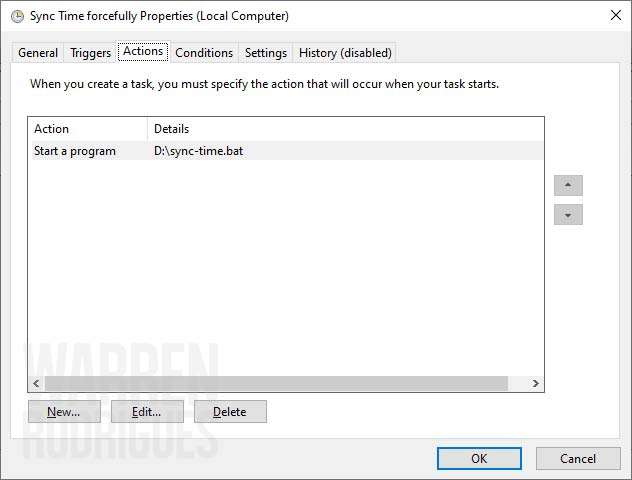 Point to the batch file, which you can get from my Github profile, linked above.
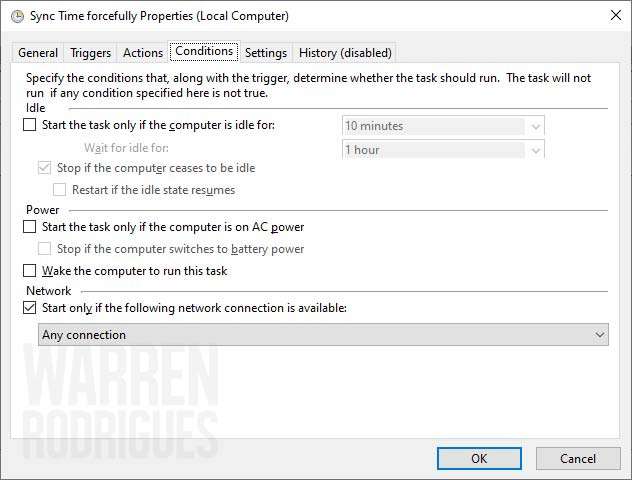 Check the setting to "Start only if the following network connection is available". And select "Any connection" or a connection that you know has internet (if you have more than one connection.)
This is working well for me for now. At some point, I guess I'll upgrade my 7 year old AMD FX-6300 work horse.
View this post on Instagram